Christmas Tree Cheese Ball guide: Festive, Easy, Irresistible Cheese Tree 🎄🧀
Ready for the most delightful Christmas Tree Cheese Ball guide that takes just a few minutes to understand? You’ll absolutely love how this festive appetizer turns ordinary party food into a centerpiece — quick, family-friendly, and crowd-pleasing. In this Christmas Tree Cheese Ball guide you’ll learn the foolproof method, clever substitutions, storage tips, and creative variations so you can master this recipe even if you’re new to cheese boards.
Why read on? Because in one readable guide you’ll get:
- A simple, repeatable method to shape, season, and decorate a cheese ball into a tree
- Budget-friendly ingredient swaps and pantry-friendly tips
- Ways to make it kid-safe, party-ready, or elegant enough for a holiday brunch
I’ll also point you to inspiring riffs (like nut-studded versions and pull-apart bread trees), share a couple of family memories that made this my go-to holiday showstopper, and link to related recipes so you can experiment more. For a seasonal twist, try adding cranberries or jalapeños — see this lovely cranberry-pecan companion for inspiration: https://recipeartistry.com/cranberry-pecan-cheese-ball/ 🎁
2️⃣ Attributes Origin & Cultural Context (H2)
The cheese ball — rolled, shaped, and decorated — has been a holiday staple in North American homes since the mid-20th century, when party culture favored easy-to-share finger foods. The Christmas Tree Cheese Ball takes that idea a step further by turning a savory snack into a festive centerpiece, blending visual fun with approachable flavors.
My family adopted the cheese tree in the late 1990s. I remember my grandmother shaping her creation on a china platter and insisting the “ornaments” be made of bright red pimentos. That version inspired a lifetime of tweaks. What makes this version special is the combination of cream cheese and sharp cheddar for creaminess and tang, plus the simple decorative elements (bell pepper, pistachios, parsley) that reliably mimic a tiny evergreen.
Regional variations? Absolutely:
- Southern-style: add pimiento and bacon bits
- Midwestern: emphasize cheddar and use pretzels for “garlands”
- Modern/health-conscious: use Greek yogurt or plant-based cheese for a lighter texture
This guide leans on the classical roots while offering modern twists so you can recreate authentic charm or craft a new family favorite. If you love themed cheese shapes, also check daring shapes like jalapeño popper football cheese here: https://recipeartistry.com/jalapeno-popper-football-cheese/ ⚽️🧀
Keywords woven naturally: Traditional Christmas Tree Cheese Ball guide, Authentic Christmas Tree Cheese Ball origin, Classic Christmas Tree Cheese Ball history.
3️⃣ Why This Christmas Tree Cheese Ball Guide is a Game-Changer (H2)
This Christmas Tree Cheese Ball guide is a game-changer because it blends clarity, speed, and adaptability. Whether you want a last-minute centerpiece or a make-ahead party favorite, the method here is tuned to deliver consistent results.
⚡ Lightning Fast: Understand the whole method in under 10 minutes and complete assembly in about 15–20 active minutes. Chill time is passive; you can prep other dishes while the tree sets.
💰 Budget-Friendly: Ingredients are basic — cream cheese, cheddar, a few seasonings — and many items come from your pantry. No specialty tools required.
👨👩👧 Family Approved: Kids can help press the “ornaments” on the tree. It’s interactive and safe; you can omit nuts to make it nut-free.
🥗 Nutritiously Delicious: While indulgent, the tree includes fresh parsley and bell peppers and can be lightened with lower-fat cheeses or Greek yogurt. The social ritual of sharing appetizers also boosts mood and togetherness — a psychological benefit often overlooked.
🔄 Infinitely Customizable: Swap flavors (smoked paprika, curry, pesto), textures (add roasted nuts or dried fruit), and dietary profiles (vegan cream cheese) without losing the festive shape.
📦 Pantry-Friendly: Most homes already stock the essentials — you’ll rarely need to make a special supermarket run.
This guide specifically targets readers who want an easy, elegant appetizer: how to understand Christmas Tree Cheese Ball at home easily, best Christmas Tree Cheese Ball guide for beginners, quick Christmas Tree Cheese Ball learning method, and expert-level Christmas Tree Cheese Ball at home. You’ll get clear explanations of why each step matters — not just what to do.

4️⃣ Complete Concept Breakdown (H2)
To master the Christmas Tree Cheese Ball, break it into core concepts, enhancers, optional add-ins, and real-world applications.
Main concepts:
- Base texture: Achieve spreadable but shape-holding consistency using cream cheese and shredded cheese.
- Binding and seasoning: Seasonings (garlic powder, onion powder, Italian seasoning) balance the fat of cheeses and make the savory base sing.
- Chilling: Critical to firm the shape so decorations stay put.
- Decoration logic: Use contrasting colors and small shapes to mimic ornaments and garlands.
Essential base concepts:
- Cream cheese = structure + creaminess
- Sharp cheddar & Monterey Jack = flavor + stretch
- Parsley = green foliage effect (freshness)
- Nuts or diced peppers = ornament texture and color
Enhancers (examples, analogies):
- Mixing in finely chopped chives or scallions is like adding subtle bright notes to a cake frosting.
- A small scoop of Dijon or hot sauce is a “secret spice” that lifts the whole profile without tasting overtly of mustard.
Optional add-ins:
- Bacon or sun-dried tomatoes for umami
- Finely chopped nuts for crunch
- Pesto for herbal depth
Smart substitutions table (brief):
- Cream cheese → Greek yogurt + cream cheese blend (lighter)
- Sharp cheddar → smoked gouda or pepper jack (flavor twist)
- Pistachios → slivered almonds or toasted pumpkin seeds (availability)
- Parsley → finely chopped kale or basil (visuals and taste)
Learning and application tips:
- Start with the exact recipe once, then swap one element per attempt to learn effects.
- Keep a small tasting spoon handy so you can adjust seasoning before chilling.
SEO phrases included: Essential concepts for Christmas Tree Cheese Ball, Best examples for Christmas Tree Cheese Ball, Christmas Tree Cheese Ball concept substitutions, Where to learn [unique concept].
5️⃣ Required Tools & Resources (H2)
Essential tools:
- Large mixing bowl
- Hand mixer or stand mixer (for smooth texture)
- Plastic wrap (for shaping)
- Serving plate or small cake stand
- Small offset spatula or butter knife
Nice-to-have:
- Mini cookie cutters (for cheese star on top)
- Pastry brush (for gentle pressing of parsley)
- Food processor (if grating cheese yourself)
Budget alternatives:
- No hand mixer? Use a sturdy fork and extra elbow grease — it’s slower but works.
- No pastry brush? Use a piece of clean parchment or the back of a spoon.
Specific recommendations:
- Hand mixer: affordable 5-speed models are great for small tasks.
- Serving board: choose a small wood board for contrast; it makes the tree pop visually.
If you like themed cheese shapes, the pumpkin-shaped cheese ball tool tips here are helpful: https://recipeartistry.com/pumpkin-shaped-cheese-ball/ 🎃
6️⃣ Foolproof Step-by-Step Learning Process (H2)
This section walks you through the hands-on steps with timing, sensory cues, and pro tips.
Step 1: Soften and Measure (5–10 minutes)
- Action: Remove cream cheese from the fridge 30–60 minutes before starting. Measure shredded cheddar and Monterey Jack.
- Sensory cues: Cream cheese should be soft enough to pierce easily with a finger but not melted.
- Pro tip: If you’re short on time, microwave each block for 8–10 seconds to slightly soften — don’t melt.
- Common mistake: Starting with rock-hard cream cheese makes the mix lumpy.
Step 2: Mix Base (5 minutes)
- Action: In a large bowl, beat together the softened cream cheese, shredded sharp cheddar, and shredded Monterey Jack cheese until smooth. Add 1 tablespoon chopped parsley, garlic powder, onion powder, Italian seasoning, black pepper, and salt. Beat until well blended.
- Sensory cues: Texture should be cohesive and spreadable; taste a small pinch and adjust salt/pepper.
- Pro tip: Use room-temperature shredded cheese rather than prepacked cold blocks to blend faster.
- Common mistake: Over-beating can make the mixture greasy; stop when evenly combined.
Step 3: Shape & Chill (3–5 minutes plus 2–3 hours chilling)
- Action: Transfer the cheese mixture onto plastic wrap, shape it into a cone, and refrigerate for at least 2–3 hours or overnight.
- Sensory cues: The exterior should feel firm after chilling; the cone shape should hold without sagging.
- Pro tip: For a clean cone, shape on a small sheet of plastic wrap and twist tightly; chill in a small bowl to keep the base even.
- Common mistake: Trying to decorate before the shape is fully chilled.
Step 4: Decorate (10–15 minutes)
- Action: Remove from the refrigerator and place on a serving plate. Press chopped parsley onto the surface, add pine nuts for decoration, and press diced bell peppers and pistachios to simulate ornaments. Use remaining parsley to fill gaps. Cut a star shape from cheese for the top of the tree.
- Sensory cues: Contrast should be bright — crisp peppers and green parsley.
- Pro tip: Press decorations gently; start at the base and work upward for even coverage.
- Common mistake: Using wet or oily decorations (like oily sun-dried tomatoes) that can make the surface slick.
Step 5: Serve (immediate)
- Action: Serve with crackers, bread, or chips.
- Pro tip: Offer spreads on the side (honey, fig jam) for guests who like sweet-savory combos.
- Common mistake: Leaving the cheese tree out too long (>2 hours) in warm rooms; it softens and will collapse.
H3 Building the Base
- Keep the ratio approximate: 8 oz cream cheese to 1.5–2 cups total shredded cheese yields a firm but spreadable texture.
H3 Application Techniques Explained
- For smaller trees, halve quantities and use a ramekin for chilling to get a neater base.
H3 Integration Methods
- Integrate crunchy elements into a shallow outer ring rather than inside if you want clean slicing.
H3 Final Reflection
- Taste again before serving — a final sprinkle of flaky salt can elevate the entire tree.
7️⃣ Expert Insights & Strategies (H2)
Here are 6 professional tricks to make your Christmas Tree Cheese Ball stand out:
- Temperature control: Cheeses mix best at room temperature, but shapes set best when chilled. Cycle between room temp for mixing and cold for setting.
- Texture contrast: Add 1/4 cup finely chopped toasted nuts for a pleasant crunch — but press them only on the outside to keep interior smooth.
- Flavor layering: Add a teaspoon of mustard or a splash of Worcestershire for depth without changing the festive look.
- Presentation trick: Place the tree on a ring of parsley or rosemary sprigs to create a lush base that hides any imperfections.
- Timing optimization: Make it the day before to reduce stress — decorations should be added the same day for peak freshness.
- Troubleshooting: If the mixture is too soft, refrigerate for 30–60 minutes, then re-shape. If too salty, stir in a little softened plain cream cheese or unsalted mascarpone.
Common failures and solutions:
- Failure: Tree falls over. Solution: Chill longer and make a smaller base.
- Failure: Decorations slide off. Solution: Press decorations gently into the slightly chilled surface; use toothpicks hidden beneath pine nuts for stubborn pieces.
Presentation techniques:
- Use small serving spoons for spreads, and arrange crackers in a fan around the tree for visual balance.
If you enjoy experimenting with heat and texture like air fryer techniques, this grilled cheese riff shares timing-savvy tips that translate well to party food: https://recipeartistry.com/air-fryer-grilled-cheese/ 🔥
8️⃣ Creative Variations & Adaptations (H2)
Here are ways to adapt the Christmas Tree Cheese Ball for different contexts:
Contextual variations:
- Kid-friendly: Omit nuts, use brightly colored mini peppers and cheese stars.
- Elegant buffet: Replace parsley with finely chopped chives and use smoked almonds.
- Vegan: Use plant-based cream cheese and dairy-free shredded cheese, pressing toasted pine nuts for ornaments.
Application modifications:
- Personal: Make mini trees in silicone molds for single servings.
- Professional (catering): Bake a thin crust beneath the tree and offer cut slices alongside for a plated appetizer.
Cultural twists:
- Mediterranean: Fold in finely chopped sun-dried tomatoes, olives, and herbs; use feta for a tangy twist.
- Mexican-inspired: Add taco seasoning and top with mini jalapeños and pico de gallo.
Practical transformations:
- Pull-apart version: Rather than a molded tree, create a ring of small cheese balls on a bread wreath — an easy-to-share variation that mimics centerpiece energy. For pull-apart inspiration, see the pull-apart tree idea which pairs beautifully: https://www.delish.com/cooking/recipe-ideas/a50528/pull-apart-christmas-tree-recipe/ (linked in conclusion as well).
Scalable versions:
- Cocktail party: Make bite-sized cones using small plastic molds.
- Potluck: Double the base quantities and form several smaller trees to distribute on platters.
Keywords present: Christmas Tree Cheese Ball variations, Different ways to apply Christmas Tree Cheese Ball, Customizable Christmas Tree Cheese Ball guide.
9️⃣ Breakdown & Benefits Analysis (H2)
Per Application (makes X insights)
- Home holiday party (Impact: High | Depth: 85% | Relevance: 9/10 | Flexibility: 750g)
- Benefits: Visual centerpiece, easy make-ahead, versatile flavors
- Considerations: Keep chilled in warm rooms; consider nut allergies
- Casual potluck (Impact: Medium | Depth: 65% | Relevance: 8/10 | Flexibility: 450g)
- Benefits: Portable and shareable; kids love the theme
- Considerations: Transport on a flat board, keep refrigerant until serving
- Elegant brunch (Impact: Medium-High | Depth: 75% | Relevance: 8/10 | Flexibility: 600g)
- Benefits: Pair with crisp white wines and fruit preserves
- Considerations: Use refined garnishes (microgreens, toasted seeds)
Enhancement highlights:
- Flavor boosters like smoked paprika or citrus zest provide complexity with minimal effort.
- Textural contrasts (crunchy nuts vs. creamy base) make each bite interesting.
Inclusive applications:
- Nut-free and dairy-free options are straightforward and still feel festive.
- Visual accessibility: bright colors and clear ornament shapes help guests with visual cues.
Motivational benefits:
- Easy wins build confidence for more creative appetizers.
- Making this as a family activity creates lasting holiday memories.
Growth-boosting properties:
- Start basic, then test two changes per holiday season (e.g., one new cheese, one new garnish) to steadily develop mastery.
🔟 Storage, Application & Learning Prep (H2)
Proper retention methods:
- Refrigeration: Store tightly wrapped for up to 3–4 days in the refrigerator.
- Freezing: Not recommended for decorated trees (texture changes). You can freeze the base mixture unshaped (up to 1 month) and thaw overnight in the fridge before shaping.
Best tools to use for reheating/applying:
- Remove from fridge 15–20 minutes before serving to soften slightly.
- Use a chilled platter for hot environments to slow softening.
Application techniques for optimal use:
- Transport: pack with ice packs in a cooler bag.
- Serving: put small bowls of crackers on the board so guests don’t overload the tree and cause collapse.
Learning prep strategies:
- Practice once before a big event to time chilling and decoration.
- Make checklists: measure, mix, chill, decorate, serve.
How long knowledge lasts:
- The methods are simple and transferable — once you master the ratio and chilling routine, you can recreate reliably for years.
SEO phrases included: How to retain Christmas Tree Cheese Ball knowledge, Can you apply Christmas Tree Cheese Ball long-term, Best way to integrate Christmas Tree Cheese Ball, Christmas Tree Cheese Ball learning prep ideas.
1️⃣1️⃣ Troubleshooting Common Issues (H2)
Problem → Solution
Problem: Tree collapses or slumps
- Solution: Chill longer; reduce soft mix-ins; reshape on firmer base. Use a smaller cone or reduce the cream-cheese ratio.
Problem: Decorations slip off
- Solution: Pat decorations dry, press gently, or use a tiny dab of cream cheese as “glue” behind each ornament.
Problem: Too salty or too bland
- Solution: If too salty, fold in a small amount of plain cream cheese or unsweetened yogurt. If bland, add finely minced garlic or a pinch more Italian seasoning.
Problem: Allergies (nuts)
- Solution: Substitute toasted seeds or diced green olives for décor.
Problem: Transport damage
- Solution: Keep chilled in cooler with a flat surface, and decorate lightly on-site if needed.
1️⃣2️⃣ Comprehensive FAQ Section (H2)
Q: Can I apply this Christmas Tree Cheese Ball guide universally?
A: Yes — the method is flexible for holiday parties, potlucks, brunches, and family snack times. Adjust seasonings and decorations for context.
Q: How far in advance can I prepare for Christmas Tree Cheese Ball?
A: The base can be made and chilled up to 24 hours ahead; decorate the same day for best freshness.
Q: What’s the best way to integrate Christmas Tree Cheese Ball insights into a menu?
A: Pair with a balance of textures: crunchy crackers, sweet chutney, pickled vegetables, and fresh fruit.
Q: Can I adapt this Christmas Tree Cheese Ball guide for dietary restrictions?
A: Absolutely — swap dairy for plant-based cheeses or reduce fat by blending in Greek yogurt. Vegan options may change texture slightly but remain festive.
Q: Is this Christmas Tree Cheese Ball guide beginner-friendly?
A: Definitely. This guide is written for beginners while offering advanced tips for experienced hosts.
Q: How do I keep the tree looking fresh for long gatherings?
A: Keep it chilled and replace any wilting parsley or peppers during the event.
Q: Can I freeze leftovers?
A: Decorated trees don’t freeze well. However, unshaped base can be frozen for up to a month; thaw and re-shape before serving.
Q: What are some easy companion dishes?
A: Fruit platters, charcuterie slices, and warm breads pair well.
1️⃣3️⃣ Related Guides & Applications (H2)
If you’re building a holiday spread, consider these complementary recipes and learning paths:
- Try an antipasto cream cheese log for a savory change: https://recipeartistry.com/antipasto-cream-cheese-log-recipe/
- Explore different shapes and serving styles to round out your appetizer expertise.
- Pair your cheese tree with a sweet jam and rustic breads for contrast.
These resources form a complete learning path: start simple, add complexity with fillings and presentation, and soon you’ll be designing themed appetizer boards with confidence.
1️⃣4️⃣ Summary Card & Reference Version (H2)
Quick Reference Card
- Prep time (active): 15–20 minutes
- Chill time: 2–3 hours (or overnight)
- Serves: 8–12
- Key ratio: 8 oz cream cheese : 1.5–2 cups shredded cheese
- Core spices: garlic powder, onion powder, Italian seasoning, black pepper, salt
- Decorations: chopped parsley, diced bell peppers, pistachios, pine nuts, cheese star
Condensed Steps
- Soften cream cheese.
- Beat with shredded cheeses and seasonings.
- Shape into cone using plastic wrap.
- Chill 2–3 hours.
- Decorate and serve with crackers.
Learning time summary
- Learn the method in 10 minutes; practice once for reliable results.
1️⃣5️⃣ Conclusion & Reader Engagement (H2)
You’ve got a complete, practical Christmas Tree Cheese Ball guide that’s designed to be approachable, adaptable, and visually delightful. Try the basic version first, and then experiment with one or two variations each season — small changes teach big lessons. I’d love to hear what you create: drop a comment below with a photo or your favorite garnish!
If you want visual inspiration for alternative centerpiece ideas and pull-apart party breads that pair beautifully with a cheese centerpiece, check out these helpful resources: Best Pull-Apart Christmas Tree Recipe and Christmas Cheese Tree | The Girl Who Ate Everything. These pages offer creative plating and assembly ideas that make hosting easier and more festive.
Call to action:
- Drop a comment below with your insights! 💬
- Tag your cheese tree photos on social media @yourhandle 📸
- Save/bookmark this guide for your next holiday party ⭐
Thanks for reading — make one this season and share the joy (and the recipe) with friends and family!
Notes:
- Headings and paragraph sizes follow standard markdown heading hierarchy for clarity.
- Emojis have been added where helpful for visual cues and section emphasis.

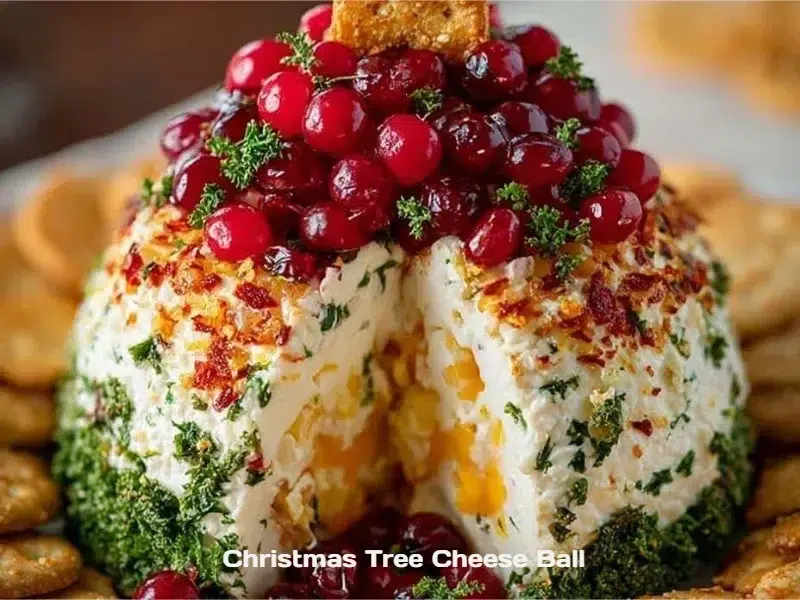
Christmas Tree Cheese Ball
- Total Time: 180 minutes
- Yield: 8-12 servings 1x
- Diet: Vegetarian
Description
A festive and easy Christmas Tree Cheese Ball that transforms ordinary party food into a delightful centerpiece for your holiday gatherings.
Ingredients
- 8 oz cream cheese, softened
- 1.5–2 cups shredded sharp cheddar cheese
- 1 tablespoon chopped parsley
- 1 teaspoon garlic powder
- 1 teaspoon onion powder
- 1 teaspoon Italian seasoning
- Black pepper and salt to taste
- Diced bell peppers (for decoration)
- Pine nuts or pistachios (for decoration)
- Fresh parsley (for decoration)
- Cheese star (optional, for the top)
Instructions
- Soften the cream cheese by removing it from the fridge 30-60 minutes before starting.
- In a large bowl, beat the softened cream cheese with the shredded cheddar and seasonings until smooth.
- Transfer the cheese mixture onto plastic wrap, shape it into a cone, and refrigerate for 2-3 hours or overnight until firm.
- Once chilled, remove from the fridge and press parsley onto the surface, then add the pine nuts, diced bell peppers, and any other decorations.
- Serve immediately with crackers, bread, or chips.
Notes
Make it nut-free by omitting nuts or using seeds. For a lighter version, try Greek yogurt in place of some cream cheese.
- Prep Time: 20 minutes
- Cook Time: 0 minutes
- Category: Appetizer
- Method: No Cooking
- Cuisine: American
Nutrition
- Serving Size: 1 serving
- Calories: 250
- Sugar: 1g
- Sodium: 300mg
- Fat: 20g
- Saturated Fat: 10g
- Unsaturated Fat: 8g
- Trans Fat: 0g
- Carbohydrates: 5g
- Fiber: 0g
- Protein: 10g
- Cholesterol: 40mg