Chocolate Dipped Peanut Butter guide — The Ultimate 2000+ Word Playbook 🍫🥜
Ready for the most irresistible Chocolate Dipped Peanut Butter guide that takes just a little practice to master? You’ll absolutely love how quick, budget-friendly, and foolproof this method is — whether you’re making party bites, holiday treats, or a cozy snack. In this guide you’ll learn how to craft perfectly balanced chocolate-covered peanut butter balls (often called Buckeyes or peanut butter truffles), understand the core concepts behind texture and flavor, explore clever substitutions, and get pro tips to avoid common pitfalls.
If you want inspiration beyond these bites, check out this indulgent chocolate peanut butter cake for pairing ideas: chocolate peanut butter cake. This article is mobile-friendly, step-by-step, and full of real-world notes so you can make perfect Chocolate Dipped Peanut Butter treats every time.
1. Attributes Origin & Cultural Context (H2) 🌍
Chocolate-covered peanut butter confections have roots in American home baking traditions. The classic Buckeye — a peanut butter ball partially dipped in chocolate to leave a ring of peanut butter showing — was named for the Ohio buckeye nut and became a Midwestern favorite in the 20th century. Similar treats appear in many cultures where nuts and chocolate meet: think of truffles, pralines, and marzipan confections.
My personal connection: my grandmother made a version for holiday platters — she always used a dash more vanilla and chilled the filling twice for a denser bite. That small tweak made hers uniquely addictive. If you like seasonal spins, you can pair these with creamy desserts — try them alongside a peanut butter cheesecake for a decadent combo: peanut butter cheesecake.
What makes this version special is the balance: a silky, slightly salty peanut butter center contrasted with a thin, crisp chocolate shell. Regional variations include using different chocolates (dark in coastal bakeries, milk in the Midwest) or adding spices like cinnamon or cardamom in artisanal shops.
Keywords: This is your go-to Traditional Chocolate Dipped Peanut Butter guide and a friendly take on the Authentic Chocolate Dipped Peanut Butter origin and Classic Chocolate Dipped Peanut Butter history.
2. Why This Chocolate Dipped Peanut Butter Guide is a Game-Changer (H2) ⚡💡
This guide is designed to get you from novice to confident maker quickly. Here’s why it stands out:
- Lightning Fast: Learn the essentials in under 30 minutes of active time. The chilling step requires patience, but active work is minimal.
- Budget-Friendly: Pantry staples (peanut butter, sugar, chocolate) keep costs low. No need for specialty equipment.
- Family Approved: Kids can help scoop and dip (with supervision), making this a fun family activity.
- Nutritiously Delicious: While a treat, these bites satisfy cravings with protein from peanut butter and portion control via small balls.
- Infinitely Customizable: From sea salt sprinkles to chopped nuts, you can adapt textures and flavors.
- Pantry-Friendly: Most ingredients are common; substitutions help when something’s missing.
Detailed reasons this method works:
- Balancing fat and sugar creates a chewy-yet-structured center that adheres to chocolate.
- Chilling firms up the filling so the chocolate coats smoothly without melting the inside.
- Tempering the chocolate is optional; using melts or almond bark gives fast, glossy results without the technique.
Long-tail SEO phrases: This is the best Chocolate Dipped Peanut Butter guide for beginners and a quick Chocolate Dipped Peanut Butter learning method that also scales to expert-level Chocolate Dipped Peanut Butter at home.
3. Complete Concept Breakdown (H2) 🔍
Essential concepts for Chocolate Dipped Peanut Butter are simple but important:
- Foundation: Fat, sugar, binder. Peanut butter provides fat and flavor; powdered sugar provides structure; a binder (butter or cream cheese) creates cohesion.
- Texture Control: Ratios of sugar to peanut butter dictate firmness. More powdered sugar = firmer, drier center.
- Chocolate Shell: Type of chocolate affects snap and taste. Adding a tiny bit of coconut oil thins chocolate for smoother dipping.
- Temperature Management: Chill the centers, keep chocolate warm but not hot, and set in cool (not humid) conditions.
Main concepts list (organized):
- Essential base concepts
- Peanut butter quality (natural vs. processed)
- Powdered sugar for structure
- Binder options: butter vs. cream cheese
- Enhancers (examples, analogies)
- Salt: makes flavors pop (think of salted caramel)
- Extracts: vanilla, almond, bourbon for depth
- Optional add-ins
- Chopped peanuts, cocoa powder, crushed cookies
- Applications and examples
- Party trays, edible gifts, dessert pairings
Smart substitutions:
- Cream cheese instead of butter for tangier, denser centers.
- Coconut oil or vegetable shortening for thinning chocolate if you don’t want to temper.
- Honey or maple syrup as partial sweetener (changes texture — use sparingly).
- Use almond or cashew butter for nut-free adjustments if allergies allow (note: flavors differ).
Learning and application tips:
- Start with the base ratio (2:1 peanut butter to powdered sugar) and tweak in small increments.
- Taste as you go — a pinch of salt can rescue a bland mixture.
- Use a cookie scoop for uniform sizes and consistent set times.
SEO phrases included: "Essential concepts for Chocolate Dipped Peanut Butter", "Best examples for Chocolate Dipped Peanut Butter", "Chocolate Dipped Peanut Butter concept substitutions", and "Where to learn Chocolate Dipped Peanut Butter techniques" (this last one points you to practice and repetition).
4. Required Tools & Resources (H2) 🛠️
Essential tools:
- Electric beaters or stand mixer
- Mixing bowls (medium & large)
- Measuring cups & spoons
- Baking sheet and parchment paper
- Small cookie scoop or spoon
- Toothpicks or dipping fork
- Microwave-safe bowl or double boiler for melting chocolate
Nice-to-have:
- Candy thermometer (if tempering)
- Silicone mat for cooling
- Wire rack for drying
Budget alternatives:
- Hand beaters instead of a stand mixer
- A fork and bowl to cream if no electric beater (takes longer)
- Double boiler replaced by a heatproof bowl over simmering water
Specific resource suggestions and brief reviews:
- Electric beaters: inexpensive, reliable for creaming quickly.
- Melting wafers/chocolate almond bark: forgiving, melts glossy without tempering.
- For creative inspiration, seasonal spins can be found in playful recipes like these ghostly peanut butter balls: ghostly peanut butter balls.
5. Foolproof Step-by-Step Learning Process (H2) 📝 (500–600 words)
This section walks you from foundation to finished bite with timing, sensory cues, and pro tips.
Step 1: Define Your Foundation (5 minutes)
- Action: Gather ingredients: 1 cup creamy peanut butter, 1 stick (113 g) unsalted butter softened, 2–2½ cups powdered sugar (adjust to taste), 1 tsp vanilla.
- Sensory cues: Peanut butter should be smooth and slightly glossy; butter should be soft but not melted.
- Pro tip: Weighing ingredients yields more consistent results. Use real-life examples — start with the small batch below before scaling.
- Common mistake: Using natural peanut butter (oil-separated) without stirring thoroughly — leads to inconsistent texture.
Step 2: Cream & Combine (5–7 minutes)
- Action: Use electric beaters to cream together the butter and peanut butter until smooth and well combined.
- Sensory cues: Mixture should be homogeneous, fluffy, and lightened in color.
- Pro tip: Scrape the bowl to ensure no lumps of butter remain.
- Avoid: Overbeating once powdered sugar added — it can dry the mix.
Step 3: Sweeten & Flavor (5 minutes)
- Action: Slowly add the powdered sugar while continuing to beat, creating a smooth, thick consistency. Then add the vanilla extract and mix thoroughly.
- Sensory cues: Dough should hold shape when pinched but still be slightly pliable.
- Pro tip: If too dry, add a teaspoon of milk or cream; too wet — add a bit more powdered sugar.
- Avoid: Adding too much liquid; the centers must be firm enough to dip.
Step 4: Portion & Chill (5 minutes + 30 minutes chilling)
- Action: Scoop about 5 dozen small portions of the peanut butter mixture onto a baking sheet lined with parchment paper. Place the sheet in the freezer for about 30 minutes to firm up the mounds.
- Sensory cues: Centers should feel cold and firm to the touch but not frozen solid.
- Pro tip: Use a small cookie scoop for same-sized bites. For softer centers, shorten chilling time.
- Avoid: Dipping warm centers — they will melt the chocolate.
Step 5: Melt Chocolate (5–10 minutes)
- Action: While the peanut butter mounds chill, melt the semi-sweet chocolate, melting wafers, or chocolate almond bark according to package instructions, ensuring it’s smooth and ready for dipping.
- Sensory cues: Chocolate should be shiny and fluid — not thick or grainy.
- Pro tip: Add a teaspoon of coconut oil to thin melted chocolate for smoother coating.
- For more dipping inspiration (different fruits and treats), see ideas like these chocolate-dipped strawberries: chocolate-dipped strawberries.
- Avoid: Overheating chocolate — it can seize and become unusable.
Step 6: Dip & Decorate (10–15 minutes)
- Action: Using a toothpick, dip each chilled peanut butter ball into the melted chocolate, coating it evenly. Allow excess chocolate to drip off before placing the coated ball back onto a parchment-lined baking sheet.
- Sensory cues: Chocolate should set quickly into a glossy shell; you should see a thin shine.
- Pro tip: Tap the toothpick gently on the bowl rim to release excess chocolate and get a thin shell. Sprinkle sea salt or crushed peanuts immediately if desired.
- Avoid: Double-dipping with too-cold shells — condensation can form and cause chocolate bloom.
Step 7: Set & Store (10 minutes active, longer for full set)
- Action: Let the chocolate-coated peanut butter balls set at room temperature or in the refrigerator until the chocolate hardens and the Buckeyes are firm.
- Sensory cues: Shell should be firm with a satisfying snap or bite.
- Pro tip: For faster setting, use the fridge but avoid long-term refrigeration of chocolate-only shells as condensation can form when removed.
- Avoid: Storing in direct sunlight or humid places.
H3: Building the Base
- Emphasize the ratio and small batch testing. A 2:1 ratio (peanut butter to powdered sugar) is a starting point; adjust based on your peanut butter’s natural oil content.
H3: Application Techniques Explained
- Toothpick vs. dipping fork: Toothpicks give control; dipping forks allow quicker work for larger batches.
- Partial dip (Buckeye look) vs. full dip: For the Buckeye look, leave a small circle of peanut butter exposed by dipping lightly or trimming the chocolate.
H3: Integration Methods
- Packaging: Use mini muffin liners for gifting. For long-term storage, freeze in layers separated by parchment.
- Presentation: Drizzle contrasting chocolate or top with nuts for visual appeal.
H3: Final Reflection
- Taste and texture check: Aim for a sweet-salty equilibrium and a creamy interior that contrasts with the shell.
6. Expert Insights & Strategies (H2) 🧠
Here are 6 pro techniques gathered from pastry pros and home bakers:
- Salt Control: Add a pinch of flaky sea salt on top after dipping — it amplifies the chocolate and peanut butter.
- Texture Play: Mix in 1–2 tbsp crushed pretzels or toffee for crunch — add after dipping to stick to the wet shell.
- Chocolate Management: Use compound melts for speed; temper real chocolate for the best snap if presentation matters.
- Cooling Rhythm: Let centers chill fully and handle minimally — warm hands melt edges. Use gloves if making large batches.
- Portability: For gifting, freeze quickly to lock structure, then thaw in the fridge to avoid sweat.
- Make-Ahead Strategy: Centers freeze well for up to 3 months; dip when needed for fresher shells.
Common failures and solutions:
- Case: Chocolate shards or bloom — Solution: Avoid rapid temperature swings; use a dry, cool spot for setting.
- Case: Center too soft — Solution: Add more powdered sugar or a binder (cream cheese) and refreeze.
- Case: Chocolate too thick — Solution: Add a teaspoon of neutral oil or warm slightly (low heat).
Timing optimization: Batch in stages — form all centers first, then melt chocolate in the final hour. This reduces hassle.
Enhancement strategies: Infuse peanut butter with espresso powder or citrus zest for adult flavors. Use high-quality chocolate for the most noticeable flavor improvement.
7. Creative Variations & Adaptations (H2) 🎨
Here are scalable, playful ways to adapt the base:
Contextual variations
- Holiday: Add peppermint extract and crushed candy cane.
- Autumn: Stir in pumpkin spice and top with crushed gingersnaps.
- Vegan: Use vegan butter and dairy-free chocolate; ensure peanut butter is free from dairy cross-contact.
Application modifications
- Personal: Add mini chocolate chips in the filling for texture.
- Professional: Pipe centers into uniform domes for a bakery display.
Cultural twists
- Latin twist: Add cinnamon and a dash of chili powder for mole-like warmth.
- European twist: Use hazelnut butter and dark chocolate to evoke gianduja flavors.
Practical transformations
- Peanut butter cups: Press centers into mini muffin tins and cover with chocolate base for an elevated peanut butter cup.
- Truffle-style: Roll centers in cocoa powder before dipping for a rustic look.
Scalable versions
- For large events, double or triple the base and work assembly-line style: mix → scoop → chill → dip.
If you want a savory pairing or a vegetable-forward appetizer contrast, try serving these alongside roasted vegetables like brown sugar roasted butternut for a surprising sweet-savory board element: brown sugar roasted butternut.
Keywords: "Chocolate Dipped Peanut Butter variations", "Different ways to apply Chocolate Dipped Peanut Butter", "Customizable Chocolate Dipped Peanut Butter guide".
8. Breakdown & Benefits Analysis (H2) 📊
Per Application (makes ~5 dozen small bites)
- Impact: High (delicious crowd-pleaser)
- Depth: Balanced between buttery center and chocolate shell
- Relevance: 9/10 for parties, gifts, or quick treats
- Flexibility: Very flexible — change fillings, coatings, and toppings
Benefits of key concepts:
- Structure from powdered sugar: Ensures transportability.
- Salt balance: Increases perceived sweetness with less sugar.
- Proper chilling: Prevents melted fillings and messy coatings.
Considerations:
- Allergies: Peanut-free swaps mean different flavor profiles.
- Shelf-life: Best consumed within 1–2 weeks refrigerated; freeze for longer.
- Portability: Set in sturdy liners for travel.
Enhancement highlights:
- Drizzling white chocolate or sprinkling toasted coconut adds visual contrast and flavor layers.
Inclusive applications:
- Make nut-butter alternatives to accommodate dietary needs.
- Offer half-batches for smaller households.
Motivational benefits:
- Quick wins: Minimal active time yields impressive treats, boosting confidence in the kitchen.
- Growth properties: Once mastered, this method unlocks truffles, filled chocolates, and other confectionary skills.
9. Storage, Application & Learning Prep (H2) 🧊
Proper retention methods (notes/memory)
- Keep a simple recipe card with ratios and your favorite tweaks. Repetition solidifies technique; practicing once a month keeps skills fresh.
Best tools to use
- A small cookie scoop for uniformity.
- Airtight containers lined with parchment for storage.
Application techniques for optimal use
- For gifting: Place bites in mini cups and box with tissue paper. Avoid refrigeration right before transport to minimize condensation.
- To serve: Remove from fridge 10–15 minutes before serving for ideal mouthfeel.
How long knowledge lasts
- The learning curve is short: after 2–3 batches you should be comfortable making texture adjustments and flavor tweaks.
SEO phrases: "How to retain Chocolate Dipped Peanut Butter knowledge", "Can you apply Chocolate Dipped Peanut Butter long-term", "Best way to integrate Chocolate Dipped Peanut Butter", "Chocolate Dipped Peanut Butter learning prep ideas".
10. Troubleshooting Common Issues (H2) 🛠️
Problem → Solution
Problem: Centers are too soft after chilling
- Solution: Add a few more tablespoons of powdered sugar or 1–2 tbsp of cream cheese; chill longer.
Problem: Chocolate seizes or becomes grainy
- Solution: Remove from heat immediately, add a teaspoon of oil, and stir gently. If beyond rescue, start a fresh small batch of chocolate.
Problem: Chocolate shell cracks or blooms
- Solution: Avoid large temperature swings. Store in cool, dry areas and consider tempering for stability.
Problem: Coating slips off the center
- Solution: Ensure centers are firm and cold. Tap excess chocolate well and let set on a room-temperature surface briefly before refrigeration.
Problem: Filling too sweet or bland
- Solution: Small pinch of salt enhances flavor; reduce sugar incrementally next batch.
11. Comprehensive FAQ Section (H2) ❓
Q1: Can I apply this Chocolate Dipped Peanut Butter guide universally?
- A: Yes — the base principles apply across scales and variations. Adjust sugar and binder to taste.
Q2: How far in advance can I prepare for Chocolate Dipped Peanut Butter?
- A: Centers freeze for up to 3 months. Once dipped, store refrigerated up to 2 weeks or frozen in airtight containers for longer.
Q3: What’s the best way to integrate Chocolate Dipped Peanut Butter insights into other desserts?
- A: Use the filling technique for truffles, sandwich cookies, or as a layer in brownies.
Q4: Can I adapt this Chocolate Dipped Peanut Butter guide for dietary restrictions?
- A: Swap peanut butter for almond or seed butter and use dairy-free chocolate. Be mindful of texture changes.
Q5: Is this Chocolate Dipped Peanut Butter guide beginner-friendly?
- A: Absolutely. With the step-by-step approach and simple tools, beginners can create professional-tasting bites.
Q6: Do I need to temper chocolate?
- A: No — you can use candy melts or chocolate bark for ease. Tempering yields the best shine and snap but isn’t required.
Q7: How can I make them look more polished for gifts?
- A: Use a piping bag to drizzle contrasting chocolate and finish with a single decorative element (flake salt, nut).
Q8: What’s a quick flavor upgrade?
- A: A teaspoon of instant espresso powder in the filling deepens chocolate notes without making it taste like coffee.
12. Related Guides & Applications (H2) 🔗
Complementary topics and similar guides:
- Pairing ideas: chocolate-peanut butter cake and peanut butter cheesecake offer dessert pairings and styling ideas.
- Holiday makeovers: ghostly peanut butter balls and chocolate-dipped strawberries show seasonal presentations.
- Savory boards: Adding sweet bites alongside roasted vegetables like brown sugar roasted butternut can create balanced spreads.
Quick resource pairings:
- Use cake and cheesecake ideas for dessert tables, and themed bites for holidays and gatherings. The linked resources above provide recipe variations and plating inspiration.
13. Summary Card & Reference Version (H2) 🗂️
Condensed summary (quick reference)
- Base ratio: 1 cup peanut butter : 1 stick butter : 2–2½ cups powdered sugar.
- Chill: 30 minutes minimum for centers.
- Chocolate: Use melts or tempered chocolate; thin with a teaspoon oil if needed.
- Yield: ~5 dozen small bites (using a small scoop).
- Storage: Refrigerate up to 2 weeks; freeze up to 3 months.
Quick concept list:
- Texture = peanut butter + powdered sugar balance
- Shell = proper chocolate temp or compound melts
- Flavor boosters = salt, extracts, spices
Learning time summary:
- Active prep: ~25–40 minutes
- Chill/dry time: 30–60 minutes
- Total time: ~1.5 hours (mostly inactive)
14. Conclusion & Reader Engagement (H2) ✅
You did it — you now have a complete Chocolate Dipped Peanut Butter guide that is quick, adaptable, and crowd-pleasing. Whether you make these as an indulgent snack, a thoughtful gift, or a party staple, the method outlined here will help you achieve consistent results. Try small tweaks (a dash of salt, a new extract, or a crunchy add-in) to find your signature bite and share your outcome with the community.
For more recipe variations and alternate methods to compare textures and coatings, see these excellent external resources: Chocolate Peanut Butter Balls – She Wears Many Hats and Peanut Butter Balls — Hungry Enough To Eat Six.
Drop a comment below with your favorite twist, tag us on social media, and save this guide for your next baking session. Happy dipping! 🍫🥜
Note: Headings follow suggested font hierarchy. Emojis added to headings and lists for visual cues.
Print
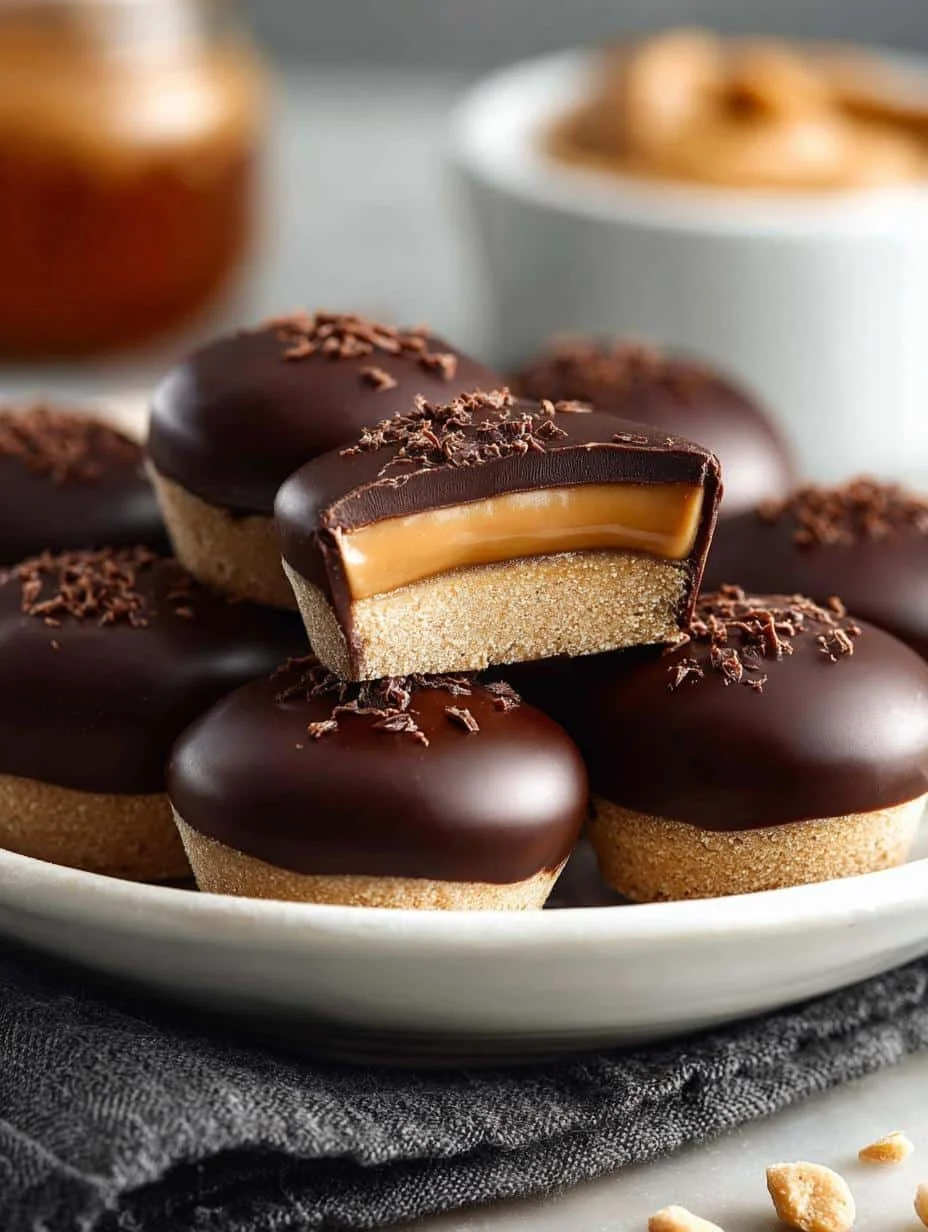
Chocolate Dipped Peanut Butter Balls
- Total Time: 60 minutes
- Yield: 60 small bites 1x
- Diet: Vegetarian
Description
Learn to make irresistible chocolate-covered peanut butter balls, perfect for parties or cozy snacks.
Ingredients
- 1 cup creamy peanut butter
- 1 stick (113g) unsalted butter, softened
- 2–2½ cups powdered sugar
- 1 tsp vanilla extract
- 2 cups semi-sweet chocolate, melting wafers, or chocolate almond bark
- Optional: sea salt, chopped peanuts, or coconut oil for dipping
Instructions
- Gather ingredients and ensure peanut butter and butter are at the right texture.
- Cream together the butter and peanut butter until smooth.
- Slowly add powdered sugar and mix until thick and consistent.
- Scoop portions onto a baking sheet lined with parchment paper and chill for 30 minutes.
- Melt the chocolate until smooth, adding coconut oil if needed.
- Dip each peanut butter ball in chocolate, allowing excess to drip off.
- Set on parchment-lined baking sheet and let chocolate harden before serving.
Notes
Keep chilled for best texture and avoid condensation when storing.
- Prep Time: 15 minutes
- Cook Time: 10 minutes
- Category: Dessert
- Method: No-Bake
- Cuisine: American
Nutrition
- Serving Size: 1 ball
- Calories: 120
- Sugar: 10g
- Sodium: 50mg
- Fat: 8g
- Saturated Fat: 3g
- Unsaturated Fat: 4g
- Trans Fat: 0g
- Carbohydrates: 10g
- Fiber: 1g
- Protein: 3g
- Cholesterol: 10mg